Start by tapping the "+" button at the bottom to select assets, enter content, and check visibility settings. You can also add further details to posts that have already been published.
Steps 01
Choose your recording method
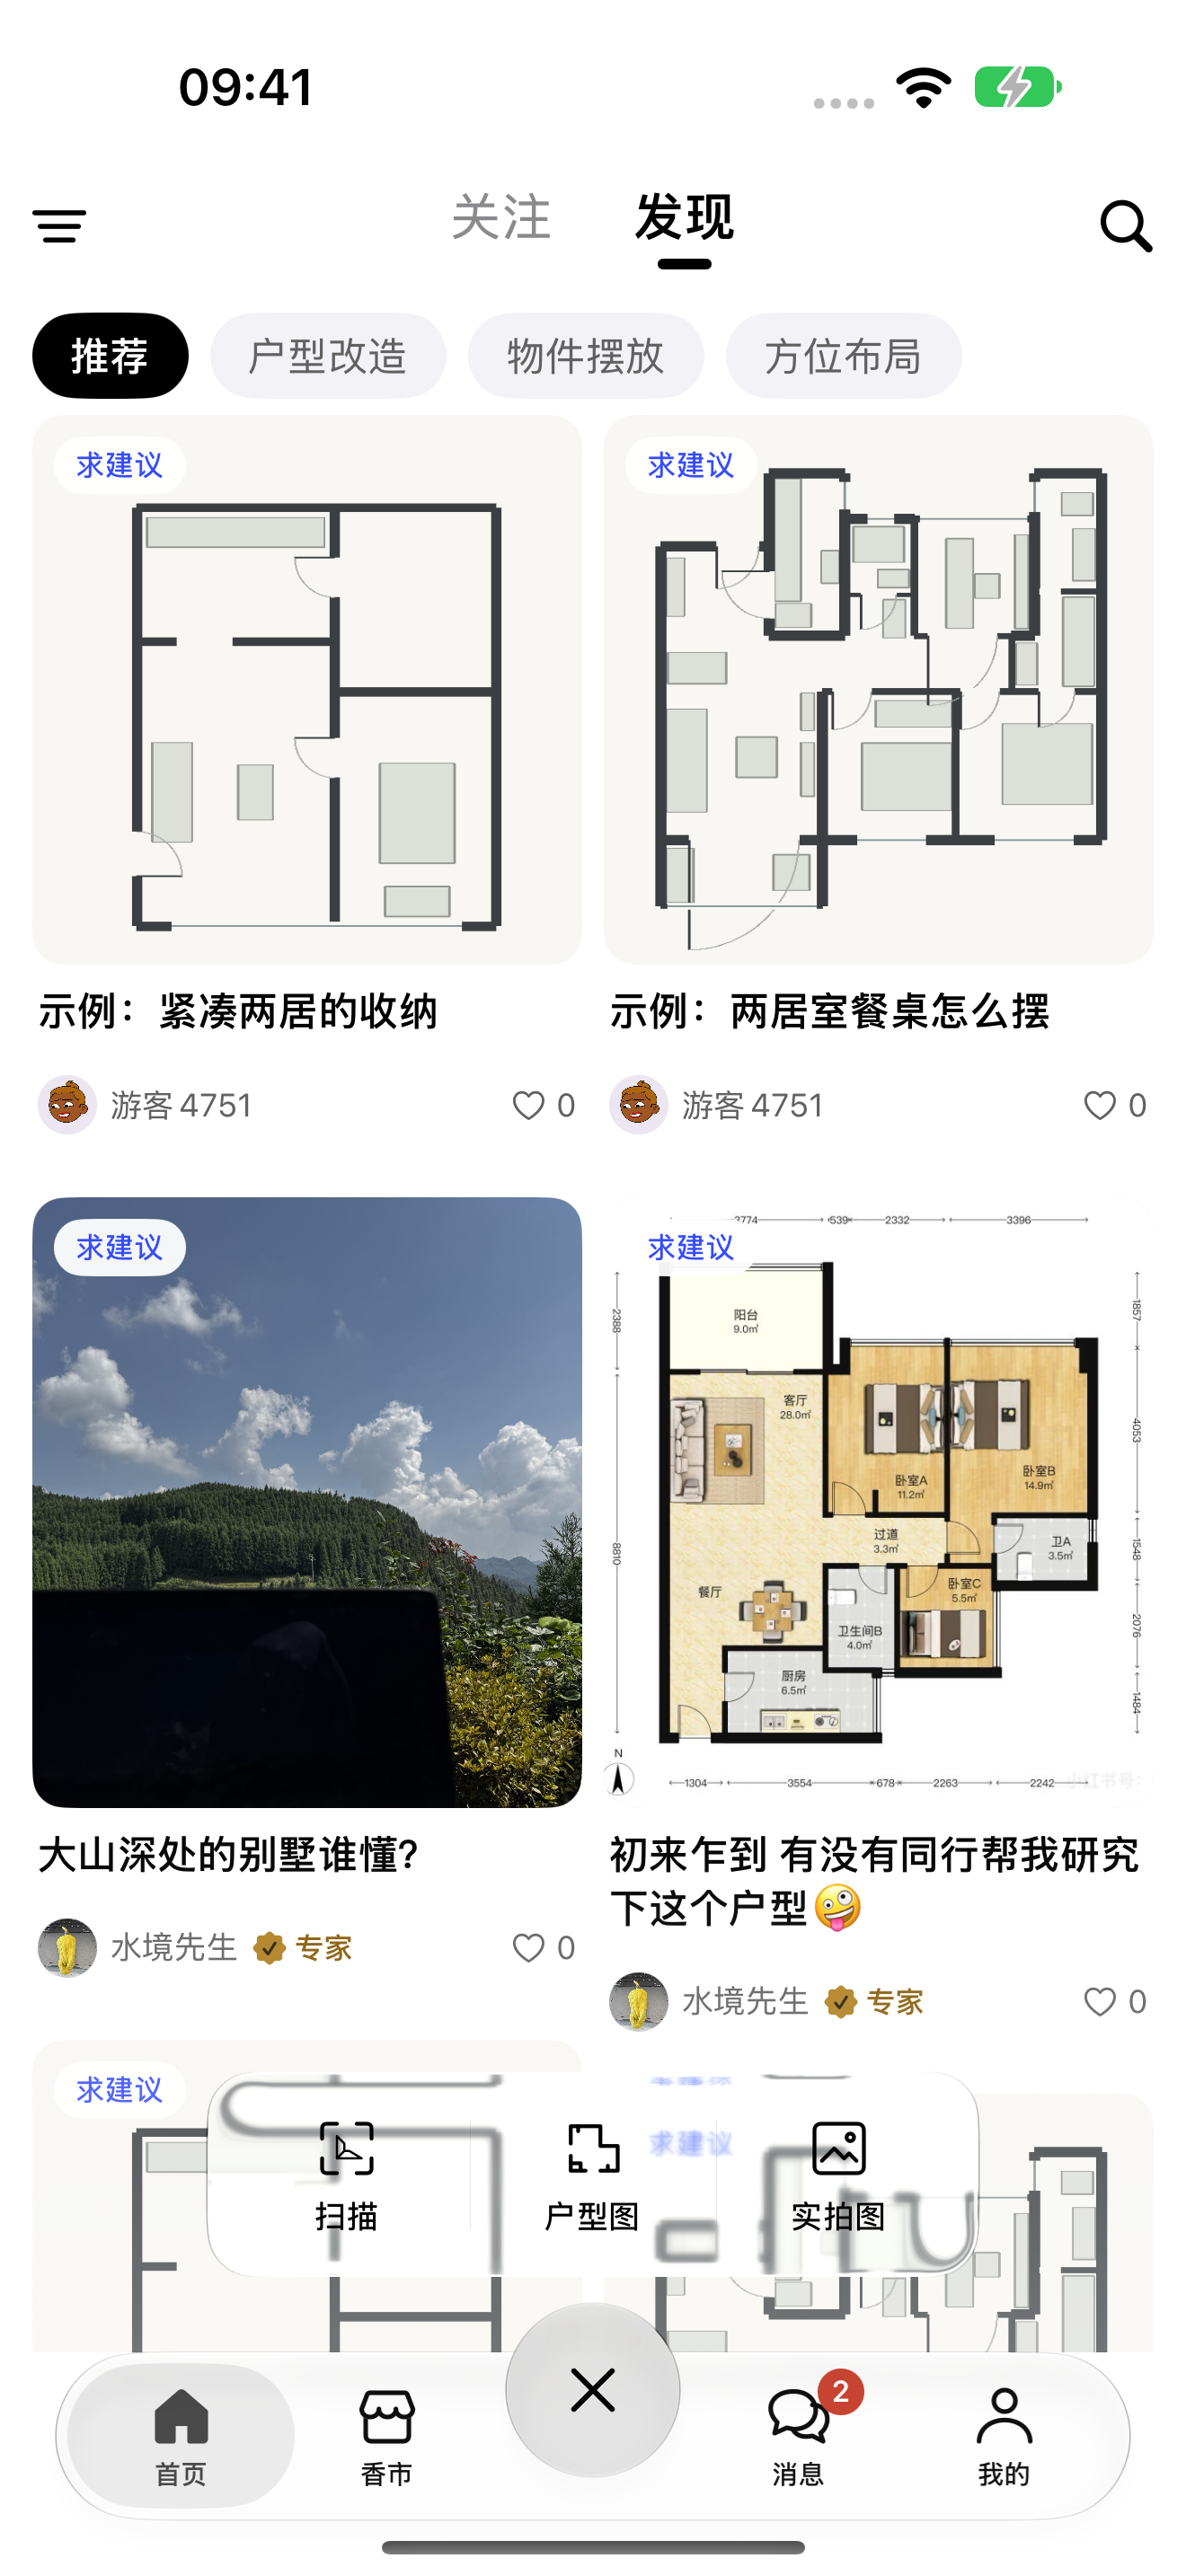
Tap the "+" at the bottom center to reveal three entry points: scanning, floor plans, and actual photos. If you already have images, you can start directly from your photo album.
1
Open the publishing interface
Click "+" to expand; click again to collapse.
2
Select asset source
Scanning is used to capture the space; floor plans and real photos are used for selecting existing imagery.
12 Tap to enlarge; the numbers in the image correspond to the operating instructions.
Steps 02
Select the photo, then return to editing
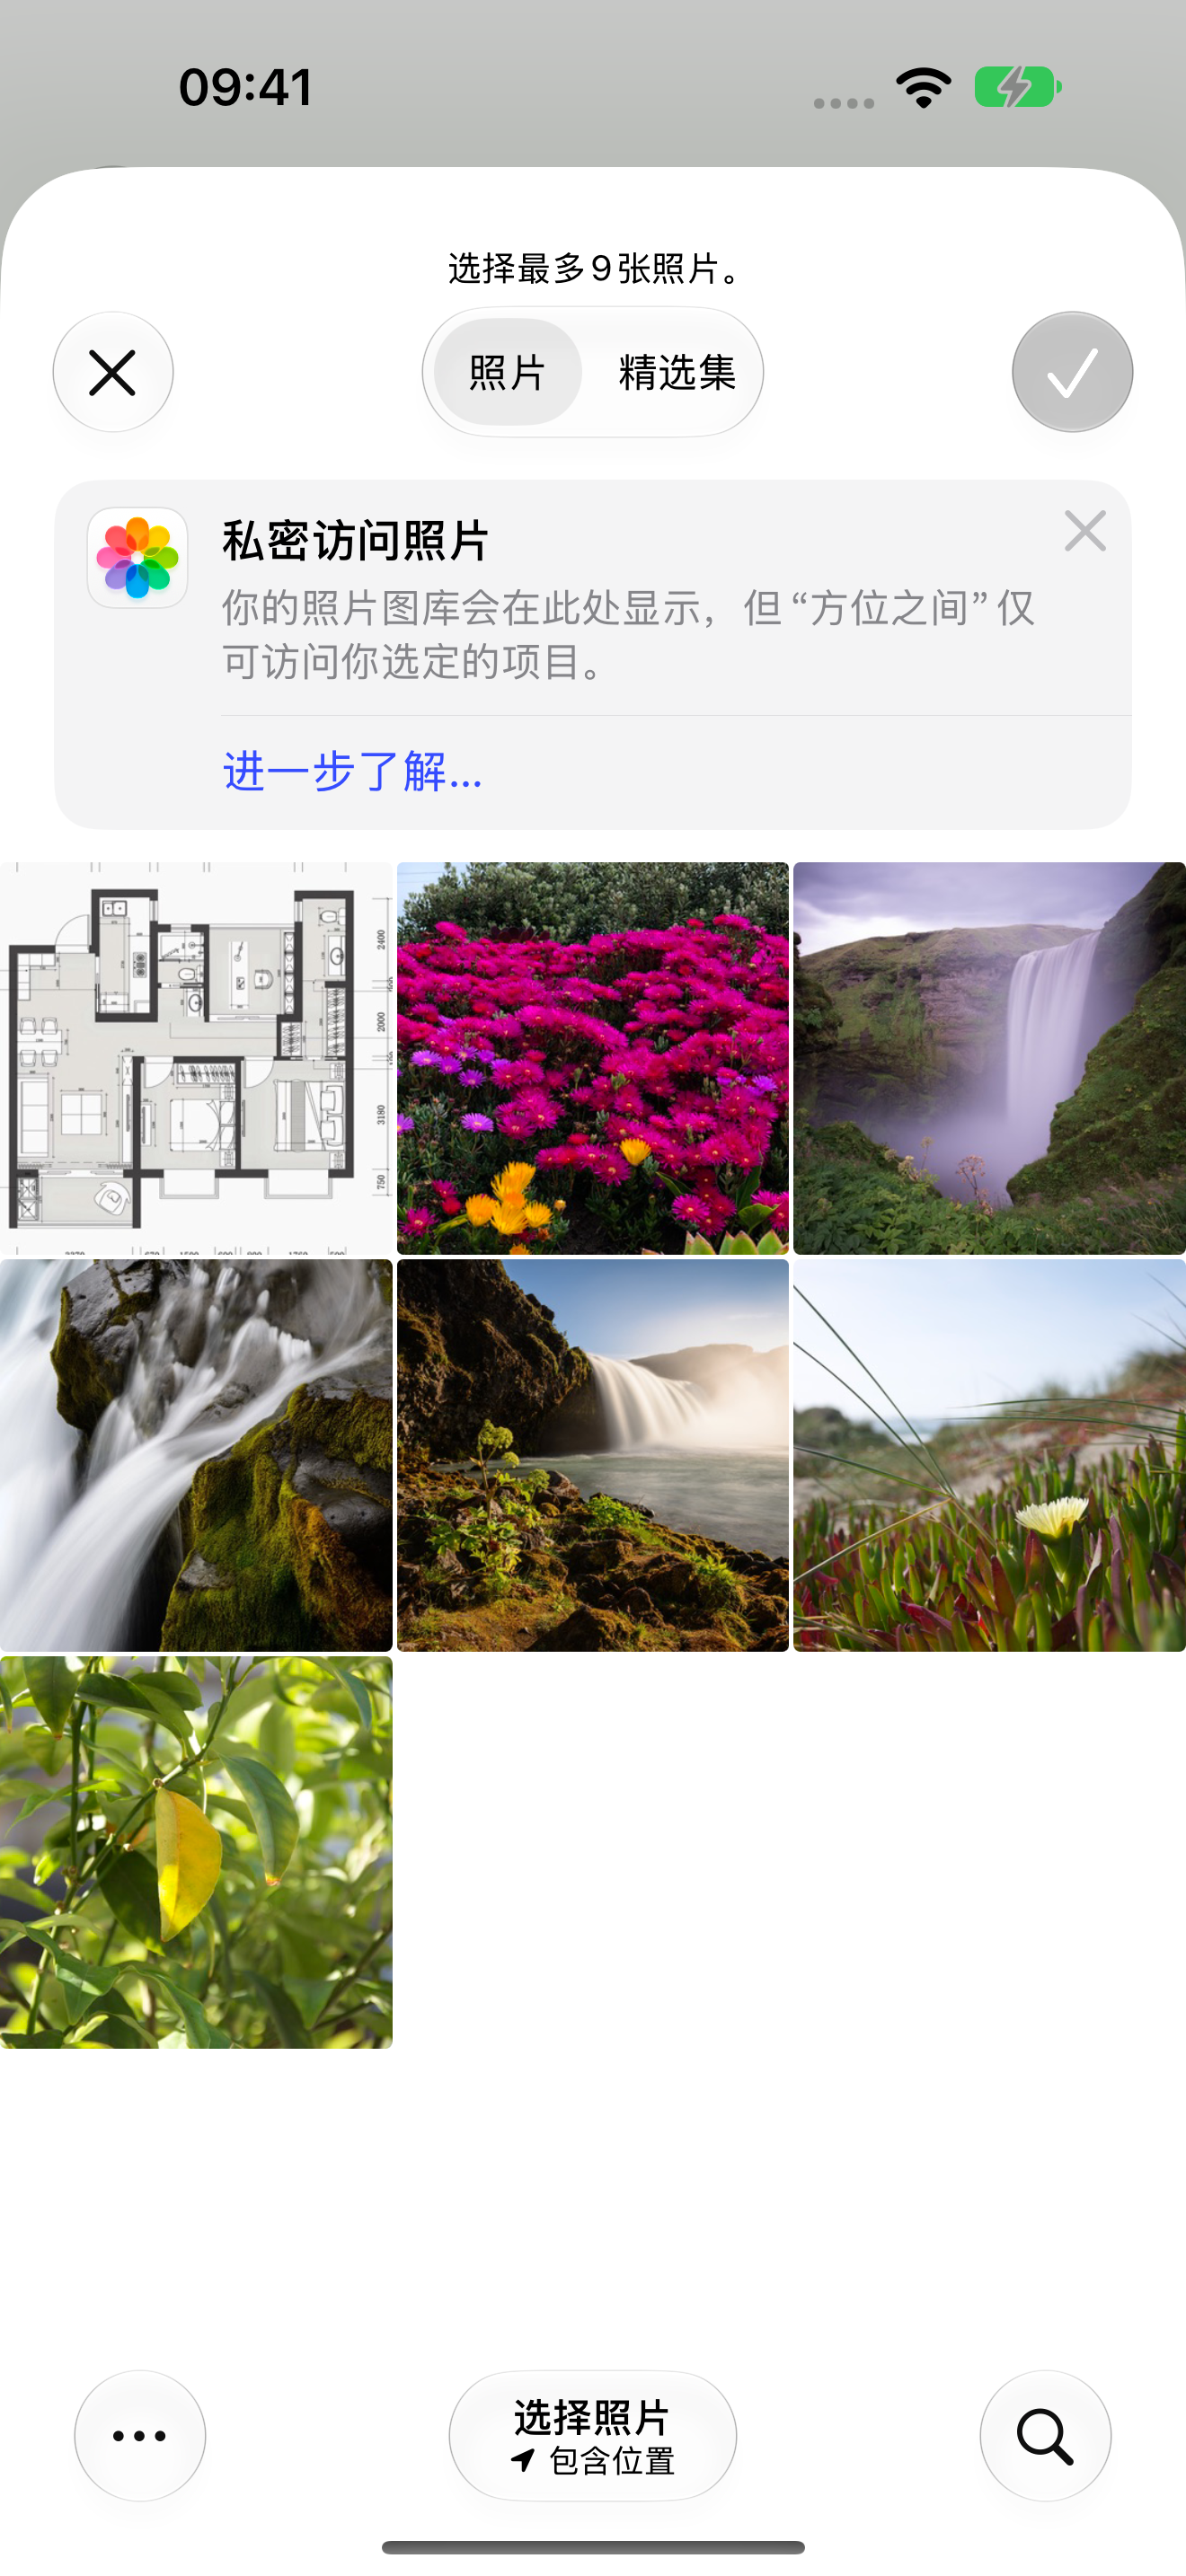
Locate the space you wish to share using the system photo picker. Prioritize clear images that effectively illustrate the points in question; you may select up to 9 actual photos of the entrance area.
1
Select image
Tap the specific photos or floor plans you need; the app accesses only the items you have selected.
2
Confirm selection
Click the checkmark in the top-right corner to return; click "Close" in the top-left corner to cancel the selection.
12 Tap to enlarge; the numbers in the image correspond to the operating instructions.
Steps 03
Clearly articulate your requirements and review them before posting.
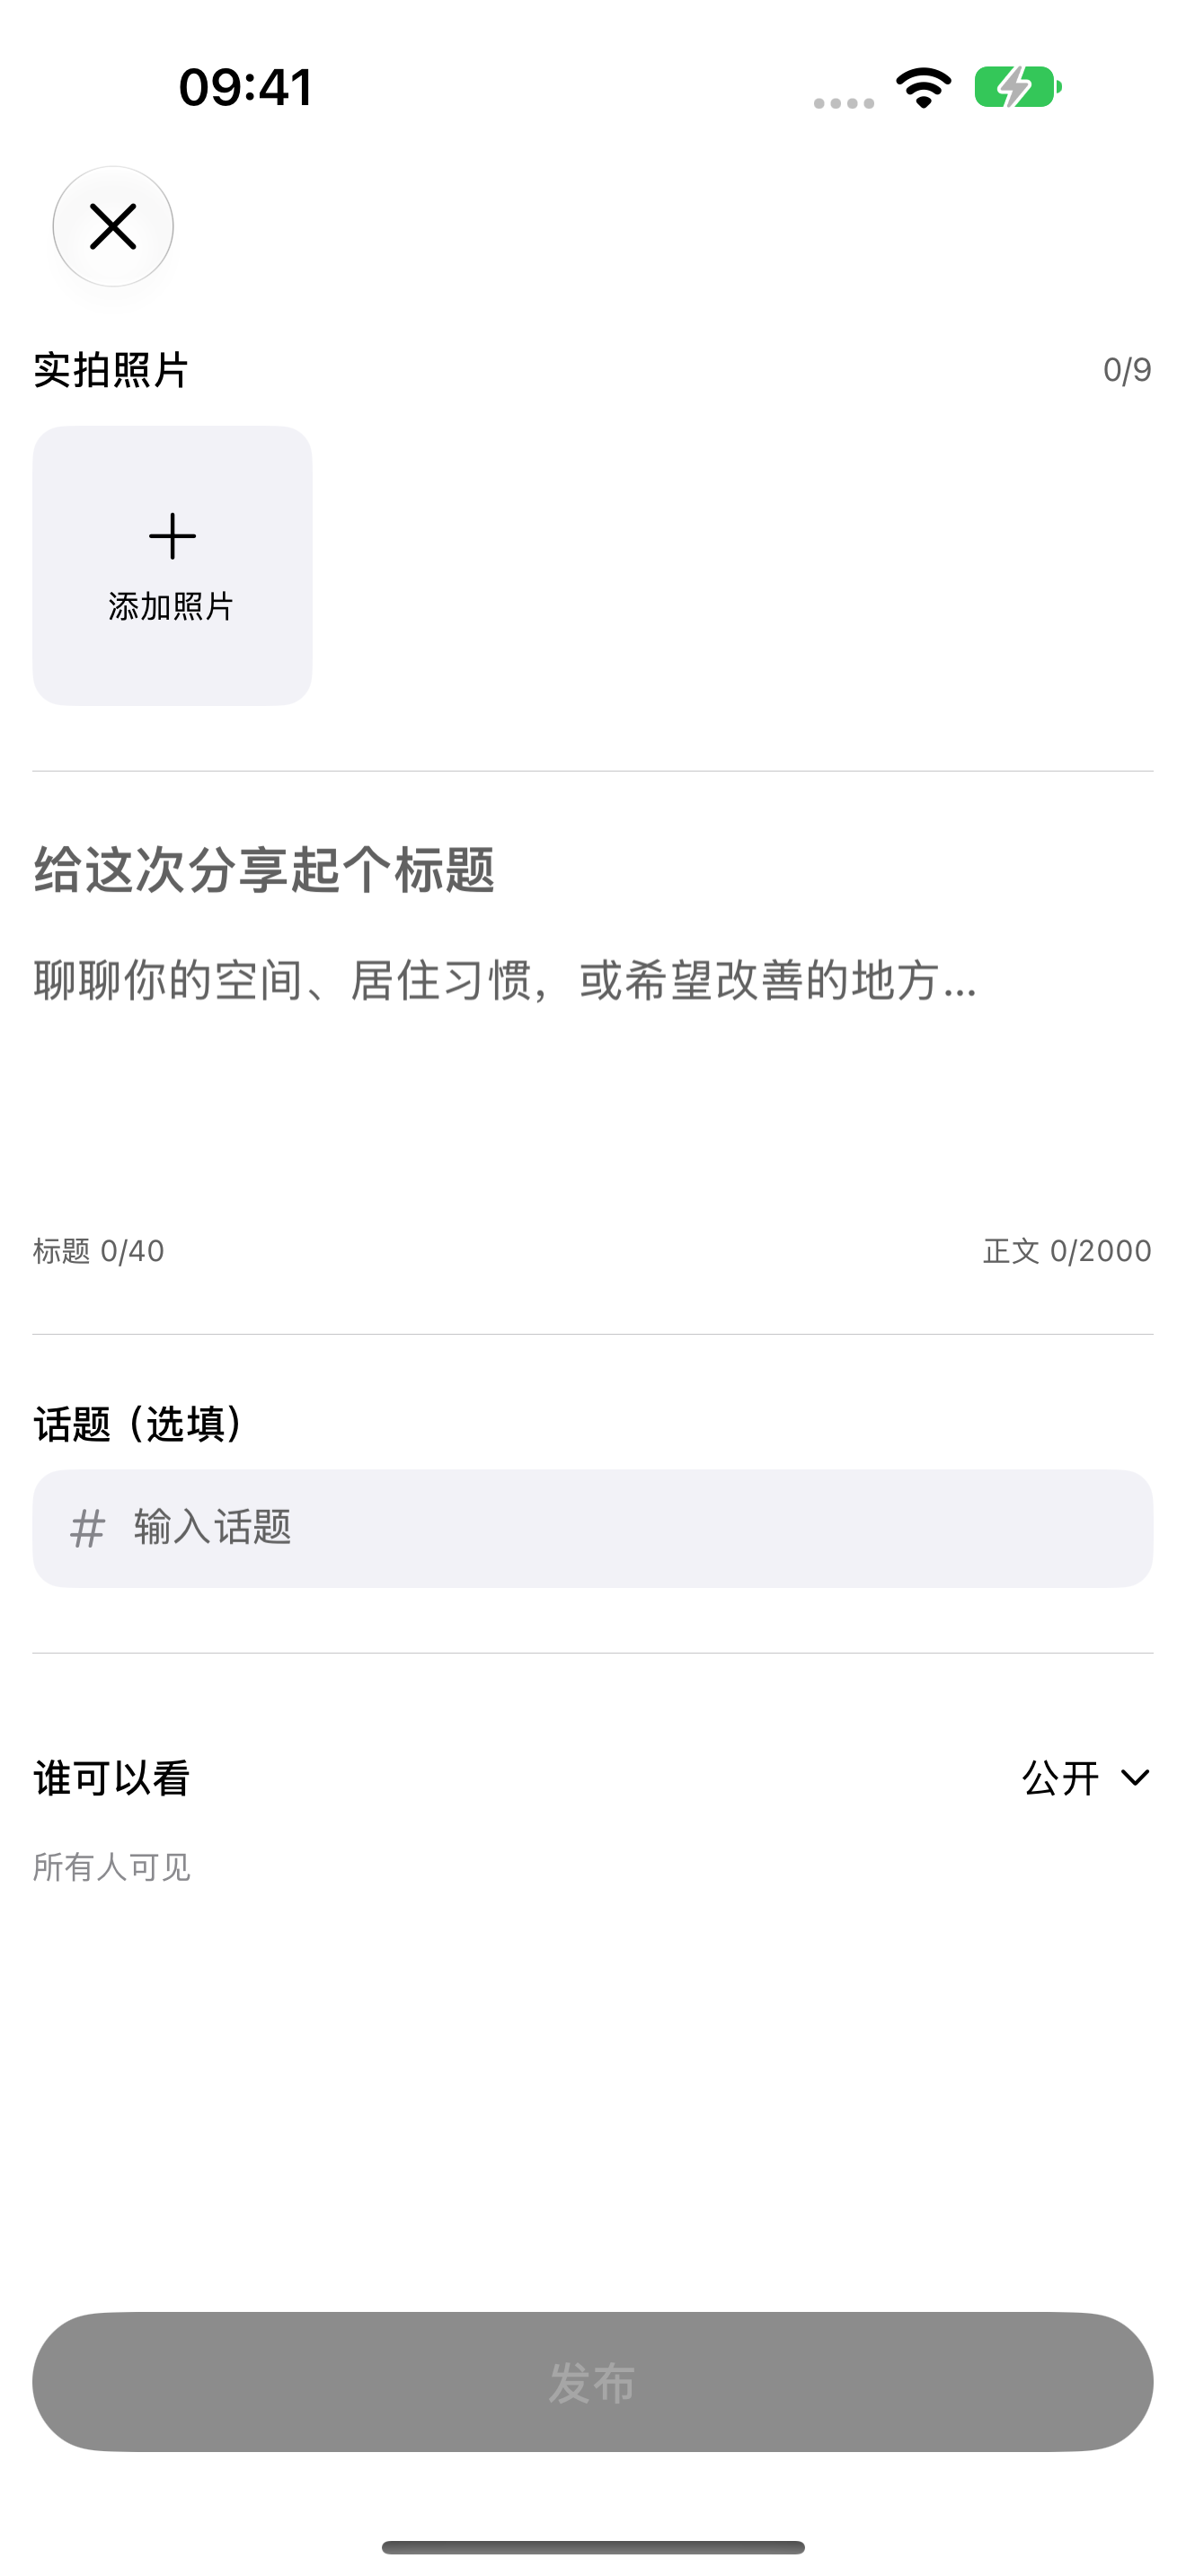
Describe the current state of the space, lifestyle habits, and the issues you wish to resolve. Being specific ensures that discussions and subsequent suggestions are better grounded.
1
Supplementary Materials
Add photos using the square "+" icon.
2
Enter title and body text
Topics are optional and can be added as needed.
3
Confirm visibility settings
Check the visibility settings, ensure all form requirements are met, and click Publish at the bottom.
123 Tap to enlarge; the numbers in the image correspond to the operating instructions.
Steps 04
You can add more thoughts after publishing
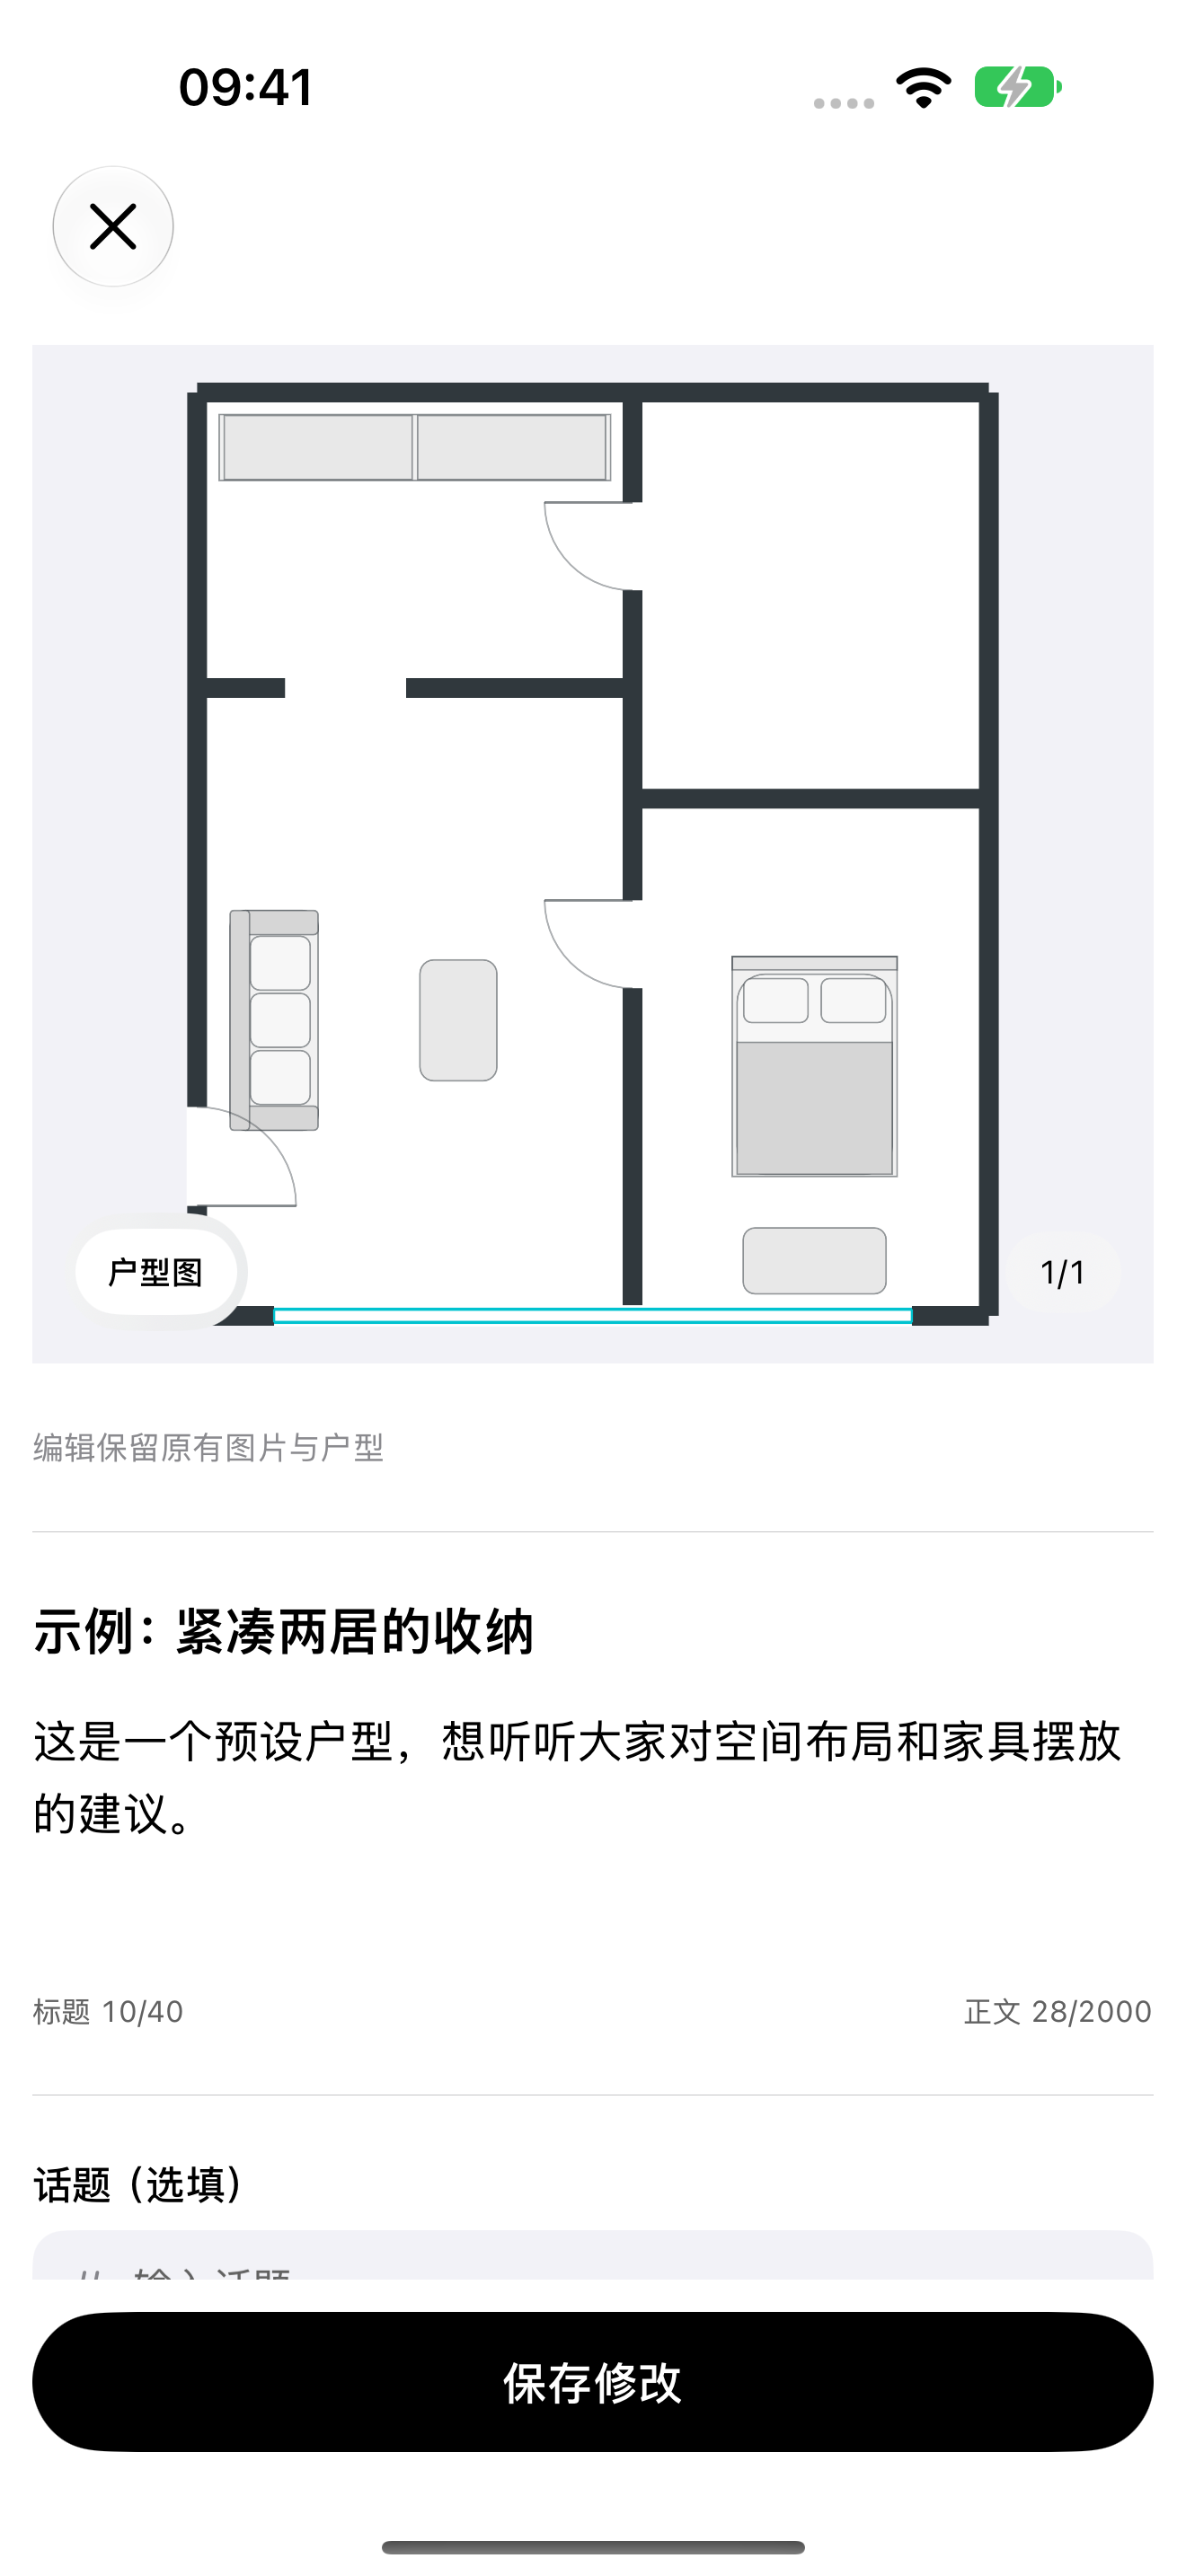
Open your post and select "Edit" via the "..." icon in the top-right corner. You can modify the title, body text, topics, and visibility settings.
1
Modify content
Modify the text while keeping the original image and floor plan layout unchanged.
2
Save modifications
Save after checking; you can discard any unwanted changes.
12 Tap to enlarge; the numbers in the image correspond to the operating instructions.